intro
Introduction to Segments
Segments are used to group your users, based on any combination of behaviours they have performed, and deliver personalised content to them.
Segments are organized in blocks, and blocks are organized in filters. Filters are connected with OR operator, while blocks are connected with AND operator. Within a filter you can create a query, combining events with time and frequency parameters, based on your needs.
To become a segment member, a user must:
- View a page or app section, and meet the same targeting criteria as the segment.
Segments Creating Best Practices
Creating segments is a lot easier if you follow some of our best practice tips:
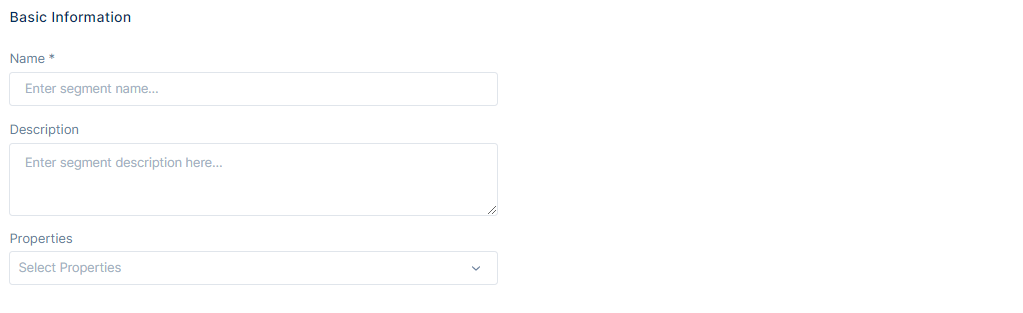
Naming
Each segment must have a name, one that makes it easy to find or group with similar segments, and it's descriptive and relevant to the audience that we are trying to target. Two or more segments can share the same name.
Description
Try giving your segment a relevant description, one that is useful when working in big teams or over different geos.
Properties
Select one or multiple properties from which you want to target audiences, so the audiences will contain users that meet the targeting criteria and are part of the selected properties.
Segment Behaviour
Bisko Segments use Boolean logic. The two ways for targeting audiences are:
- Either one or another(OR)
- More than one segment at the same time(AND)
Connections in segments
An organization can enable a connection with another organization. For more information about connections, follow this link: Connections
If organization A enables a connection with organization B, it automatically shares data that user has given consent to be shared with organization B. Those data include events or records or both of them. Depending on which data the organization A has shared, those data can be used in organization B in segment creation process. While editing that segment, other data from the organization A(filters, events, records) can be added, edited or deleted within the segment.
If organization A has disabled the connection, for the existing segments that have been created before the connection was disabled, past data(filters, events, records) will still be shown but they will stop processing. That means these data can't be edited/deleted or new data from the organization A can't be added. For new segments that will be created after the connection was disabled, data from organization A will no longer be accessible.
While creating segments we can add data saved in records. Record can be enabled/disabled, but either way segments are able to use those data. The only difference between enabled/disabled records is that disabled records are not actively collecting data. 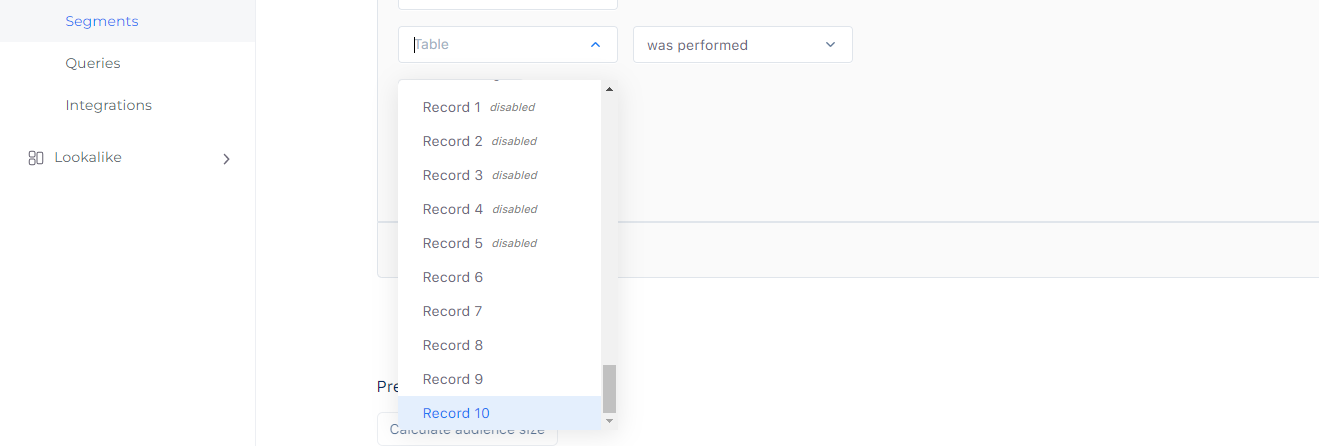
Event
Segments are build around events. The first thing you notice when creating a segment is the event you want to base it on. The simplest segment you can create is one that states whether an event has been performed, or not.
Duration and Frequency
Duration
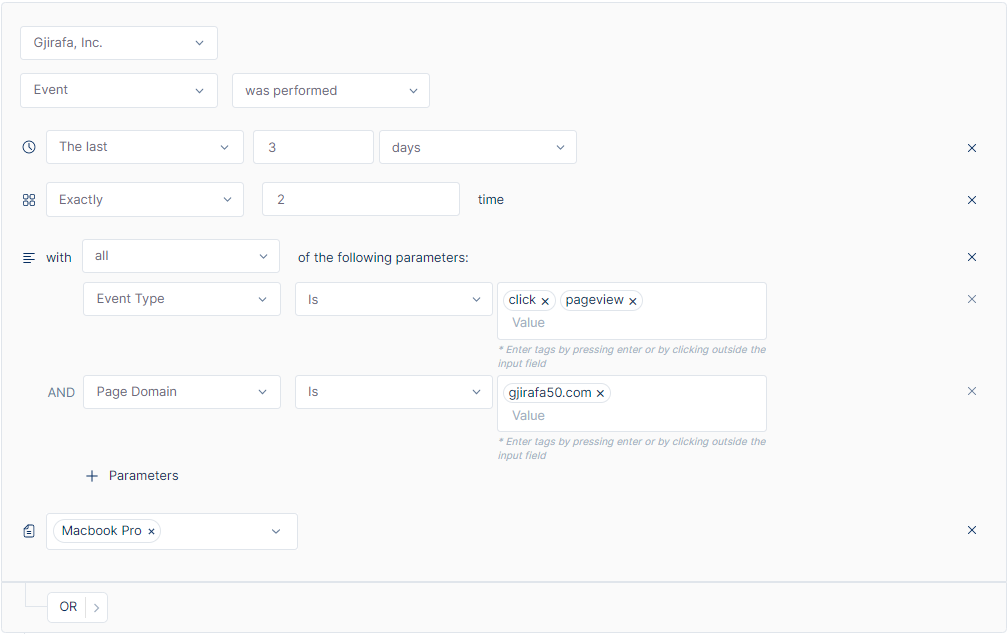
Time is another factor that allows you to define the duration in which a user has performed (or not performed) your event, to be included in the segment. Above is the example of selecting users who have performed an event in the past 5 days.
Frequency
You can also specify the number of times a user has performed the action to be included in a segment. Above is the example of a user who have performed an event exactly 2 times.
ALL/ANY
Decide if you want the parameters selected to be separated by an ALL or an ANY, by changing this criterion to all or any.
- To focus your audience pool, choose ALL.
- To expand your audience pool, choose ANY.
Selecting Parameters
Further, you can use parameters to filter users's behaviour, to include them in segments. When events are sent into Bisko, they include parameters, which then are available in the segment builder.
Choose a parameter to segment by and decide whether you’d like the keyword you enter to contain, match the keyword exactly using is, or if it starts/ends with the specified input. When inputting keywords make sure to input all possible options to increase your audience reach.
Parameter values are case insensitive.
Each keyword is separated by an OR, so the more you have, the greater your audience expansion.
As is mentioned above at the Event Collection, that despite predefined properties you can also send custom properties. The approach to use the custom properties is to define the Custom Parameters, and to specify the name and then the value of the custom parameter in the next fields.
Parameter keys and values are case insensitive.
You can link together as many different parameters as you like. The example above shows parameters around the Event Type and Content Name.
Selecting Topics
In addition to the previously indicated filters, there is a Topics filter that adds another dimension to audience segmentation.
A topic is a collection of keywords that you can use to target the user's overall content consumption. More information related to contextual targeting and topics can be found here.
Topics in this case can be used to retarget the users, who are relevant to the certain conditions of the segment and at the same time consumed content which falls into any of the chosen topics.
During segment creation multiple topics can be chosen.
AND/OR
So far we have seen the basic building blocks of a segment, but once you've specified one criteria, you can chain as many different statements together using AND and OR rules.
Use the OR option to expand your segment.
Use the AND option to focus your segment.
Remember when you are using AND/OR, the builder is creating segments on a new event and therefore, a new statement, which means that duration, frequency and parameters must be set again for this new event.
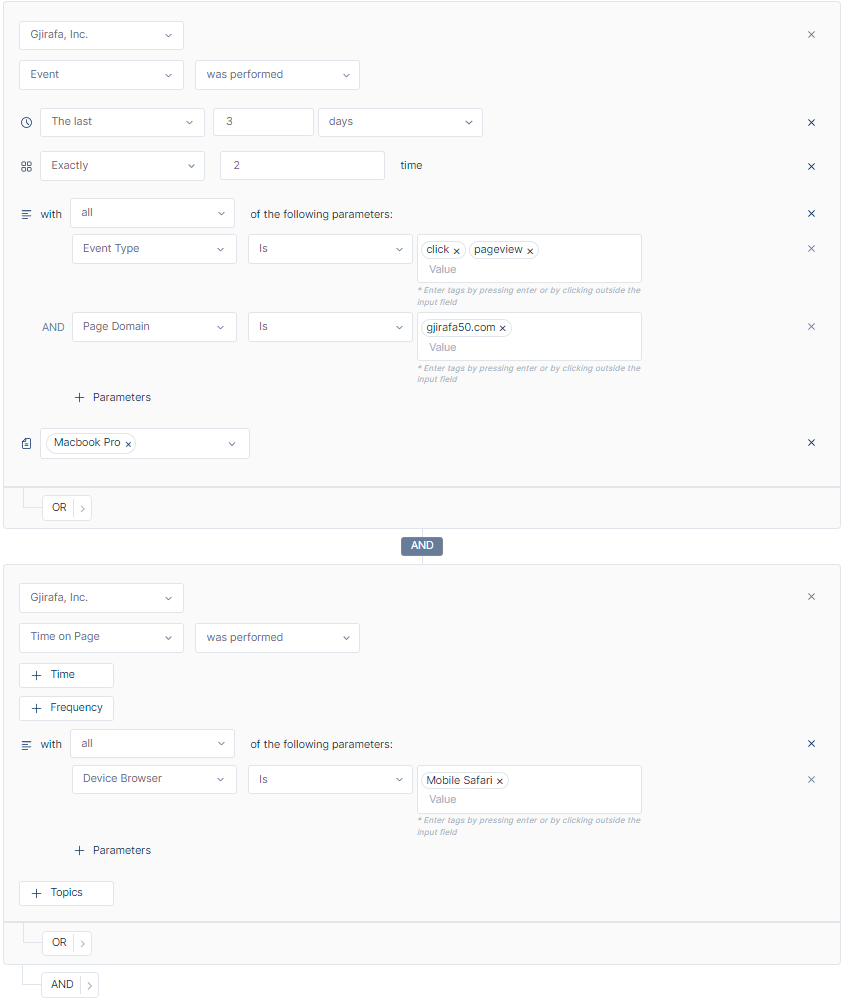
The following example shows how to build a segment, using a few of the segment builder tools mentioned so far, combined with and AND.
Creating segment of ‘Users who have added to cart at least 3 times, in the last 15 days, on the Gjirafa50 domain and users who have performed an event exactly 2 times, between two specified dates, and whose content name contains "computer".
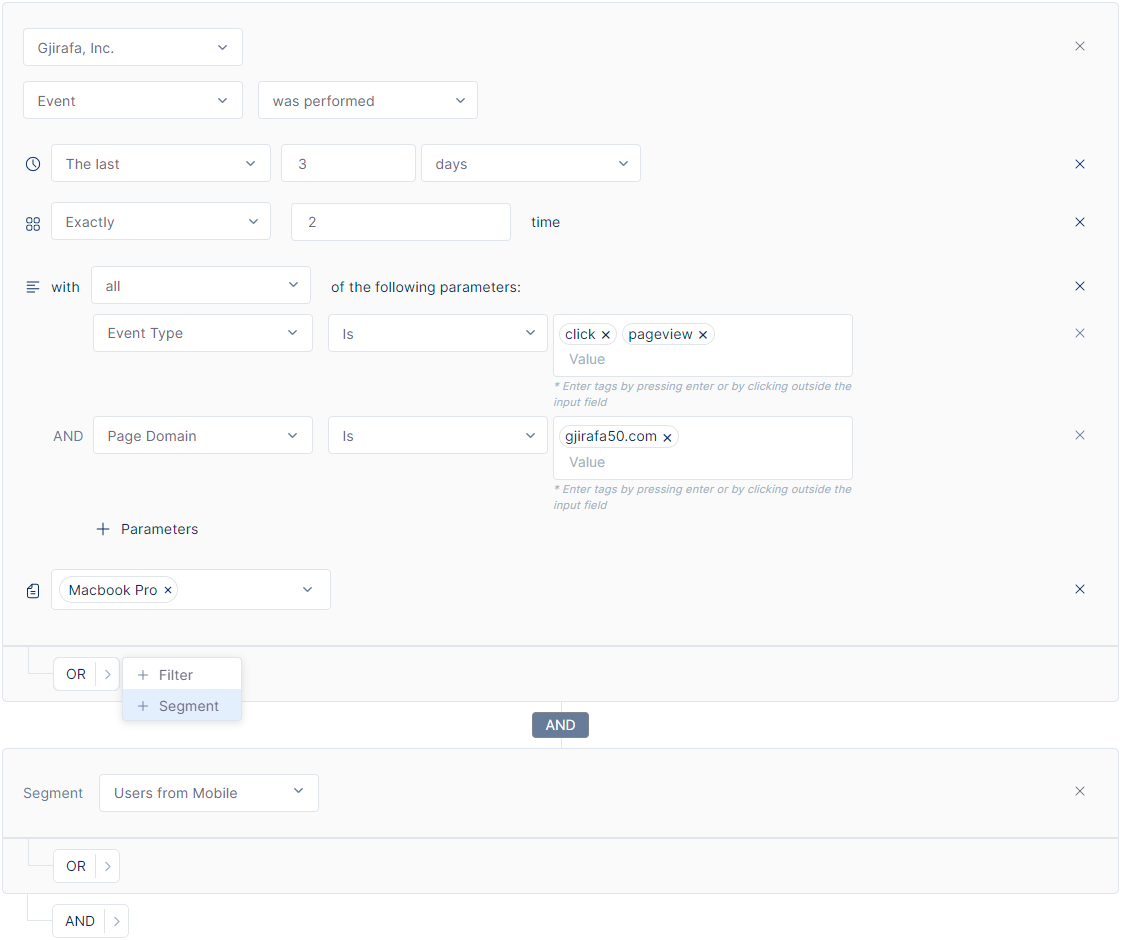
- Segment Combination
Another method of filtering involves combining pre-created segments that are utilized for audience targeting and integrating them in accordance with the above-mentioned AND/OR operators.
Find more examples on Creating Segments following this link: Segment Examples
Size calculation
You can see the number of users who have met the criteria of your segmentation by manually clicking on Calculate audience size button.

Calculate Audience Size works on standard segments and custom queries.
Custom Queries
In addition to the standard segments, where user segments can be created as explained above, Bisko offers another feature to create user segments.
Custom Queries offer a more technical approach to user segmentation, for those advanced users who are well versed in SQL and for those complex segmentation cases that can't be created using standard segment interface.
Query validation
In addition to the name of the segment, which is required, every query must pass certain criteria in order to be eligible to be used for user segmentation.
Bisko uses Google BigQuery to store the data, against which the custom queries are executed and that should be taken into consideration when writing the custom queries.
For the custom query to be considered as valid, the following conditions must be met.
Custom Query must be written in correct SQL format.
- BigQuery supports two SQL dialects:
Every query must return BiskoId.
- Return format should be User.BiskoId or just BiskoId, case sensitive.
Query must process less than 100 gb of data in a single run.
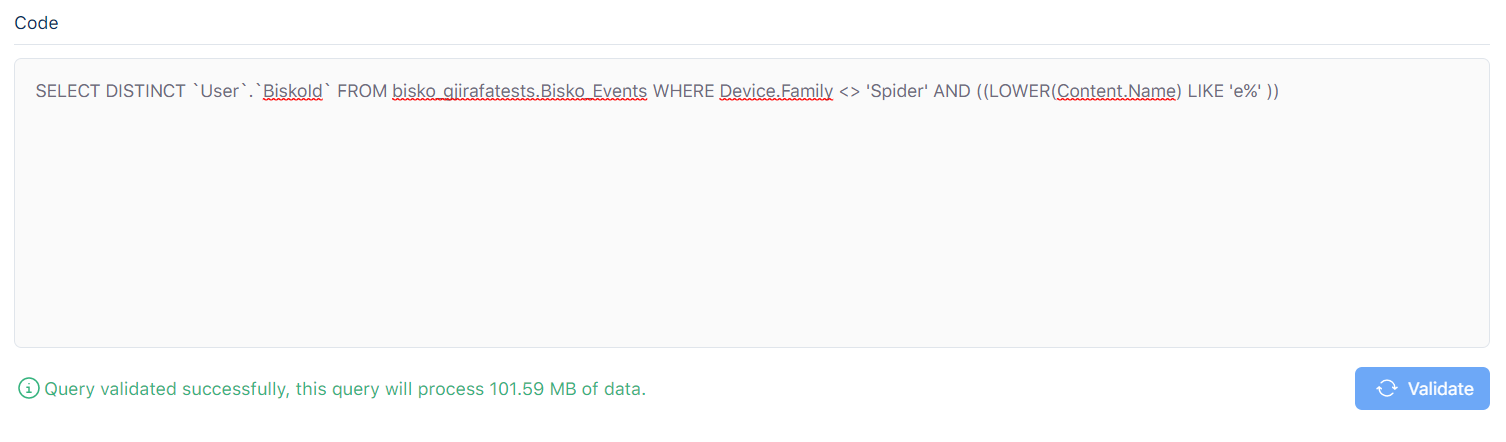
If the query is validated successfully a message will appear at the bottom of the query box with the size of data that will be processed in a single execution. If the query fails validation, an error message will be shown, specifying what is wrong with the query.
Important
Since queries are executed against Google BigQuery this imposes additional costs.
All Bisko segments are recalculated every two hours by default. This implies an additional cost of
12 * (single run data processing price)daily.
User Linking
User linking enables the expansion of segments using AI algorithms to identify the same user cross different devices.
User linking as of now is a closed feature still in testing and not accessible to general users.
Segment processing statuses
Segment processing pipeline has three parts:
- Identifying users that meet the conditions to be part of the segment.
- Saving the list of segment users to cloud storage to be used by Lookalike Modeling.
- Expanding list of users by applying user linking, when enabled.
Standard and Custom segments can have one of the following statuses:
Active status, is when:
- The segment is processing regularly.
- Segment processing was initially successful, but reprocessing failed. The status message will show the date of the last successful processing e.g. "Last processing date is {date and time of last successful processing}".
Processing status, is when:
- The segment is currently processing or reprocessing.
Partially processed status, is when:
- The segment failed to save the output in Gjirafa storage on initial processing, the status message will show “Failed to save segment output”.
- The segment failed to connect users accross devices for cross-device user linking on initial processing, the status message will show “Failed to apply user linking”.
Failed status, is when:
- The segment failed to execute the query or update standard segments on initial processing, the status message will show “Processing failed”.
Deactive status, is when:
- The segment is deactive when it is manually deactivated by the user.
Introduction to Lookalike Models
Lookalike Models in itself contains groups of users that have a certain degree of similarity to the ones in the standard segment. User grouping is done using machine learning algorithms, based in their behaviour and the content they have consumed.
To provide the Lookalike Modeling feature, Bisko utilizes GjirafaTech's AIHub. The created groups can be used as segments to target specific users. Since these segments are created from Lookalike Modeling process they're called Lookalike Segments.
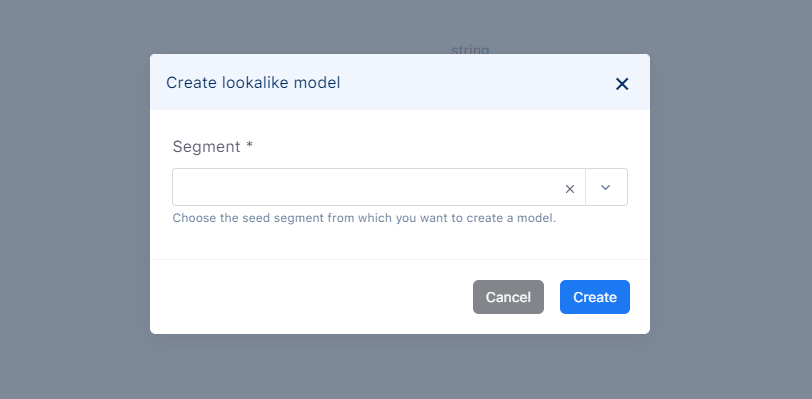
Lookalike Model Creation
A standard segment is needed to create a lookalike model.
After the seed segment is chosen, AIHub is instructed to train a lookalike model based on that seed segment. Users are groupd based on their percentage of similarity to the seed segment. After the model is trained, the user groups from the model can be used to create segments, namely lookalike segments.
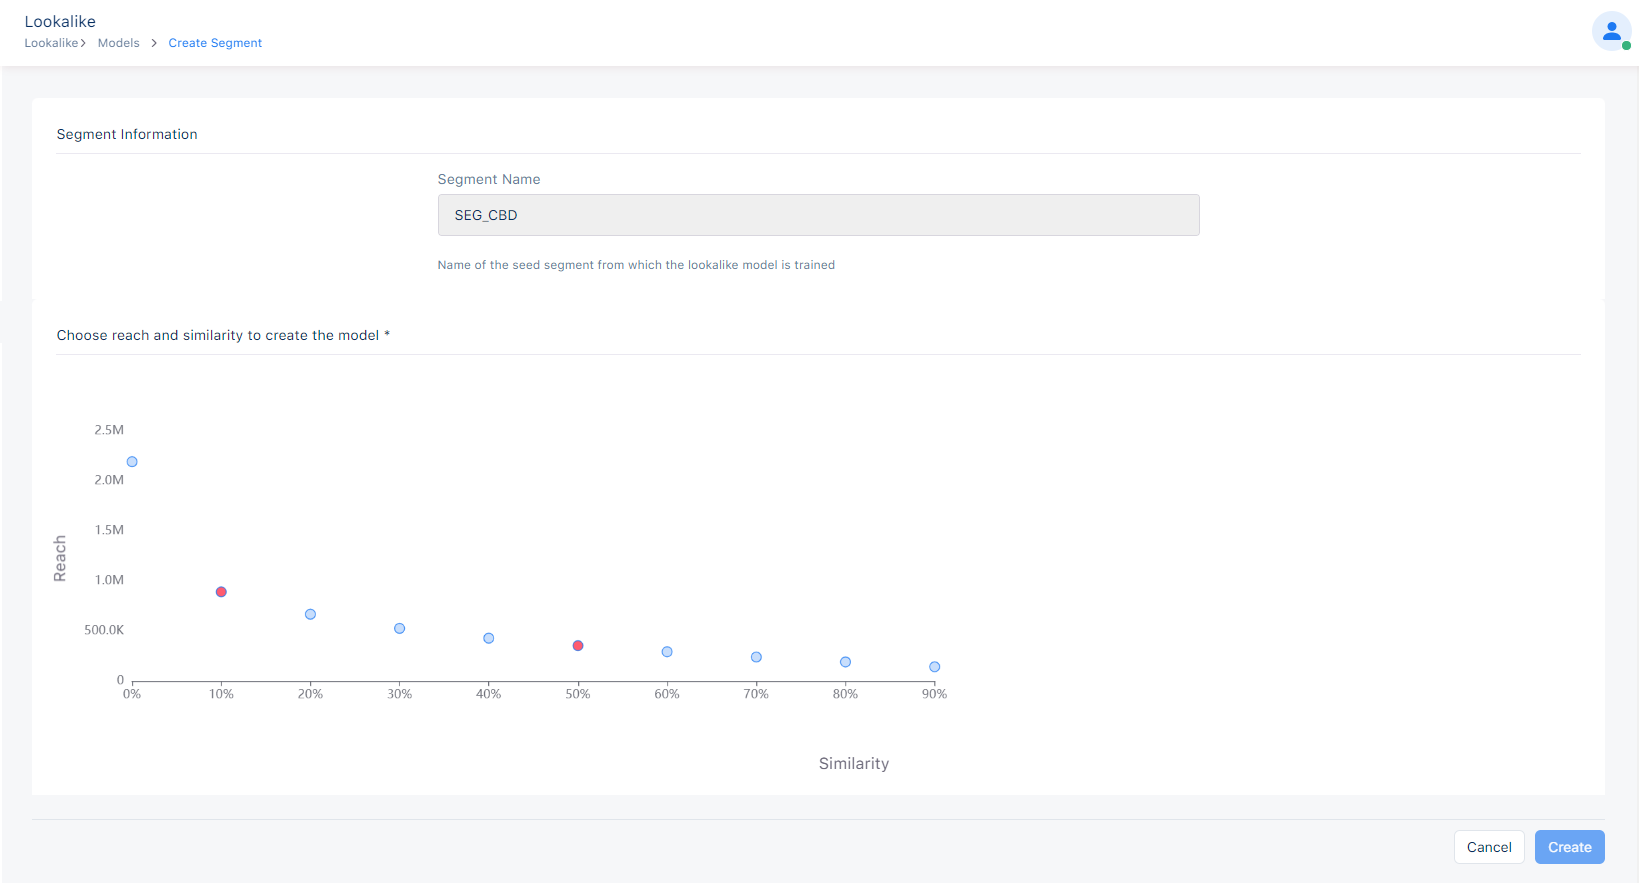
Lookalike Segment Creation
When clicking a lookalike model that has already been trained, a screen as below will be shown, from where a Lookalike Segment can be created.
Segment Name is the name of the seed segment from which the lookalike model is trained and this field it not editable.
Reach and Similarity of the graph represent number of users in the group with x % similarity to the seed segment. You can choose any point in graph that isn't used until now to create a lookalike segment.
Introduction to Integrations
Bisko offers the possibility to send segments to third party services, so these segments can be used for targeting or other purposes specific to these services, via its out of the box integrations. Each third party service has some required parameters that should be provided in order for that integration to be activated.
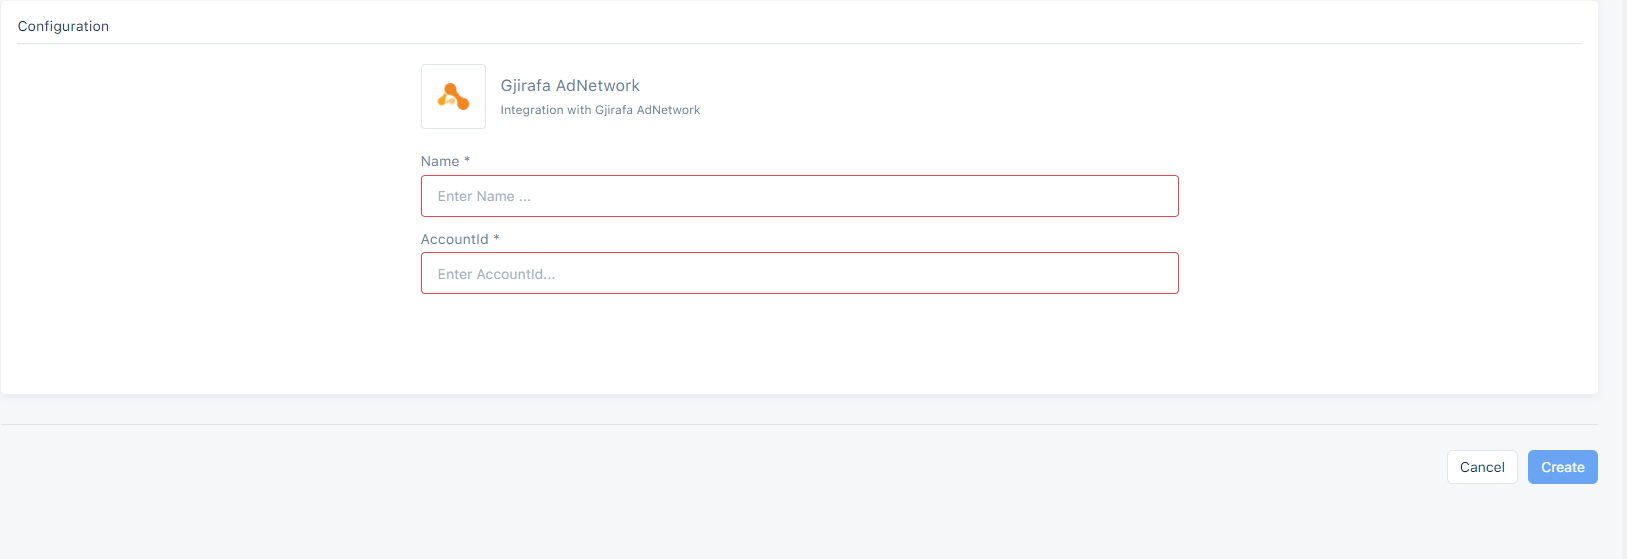
Name is a required property for every integration. The name should make an integration easy to find. It is possible to create multiple integrations with the same name and type.
1. Gjirafa AdNetwork Integration
- AccountID is required to activate an integration with Gjirafa AdNetwork. This is the unique identifier for the Gjirafa AdNetwork account.
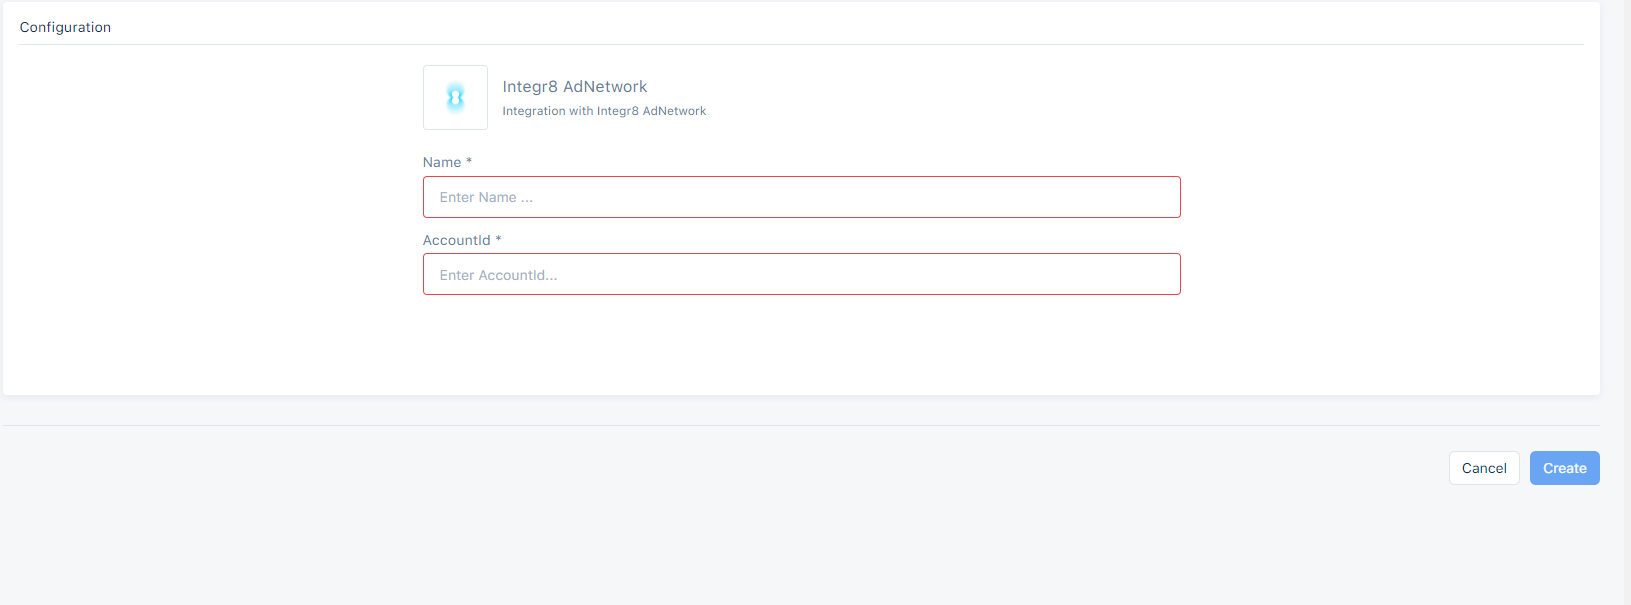
2. Integr8 AdNetwork Integration
AccountID is required to activate an integration with Integr8 AdNetwork. This is the unique identifier for the Integr8 AdNetwork account.
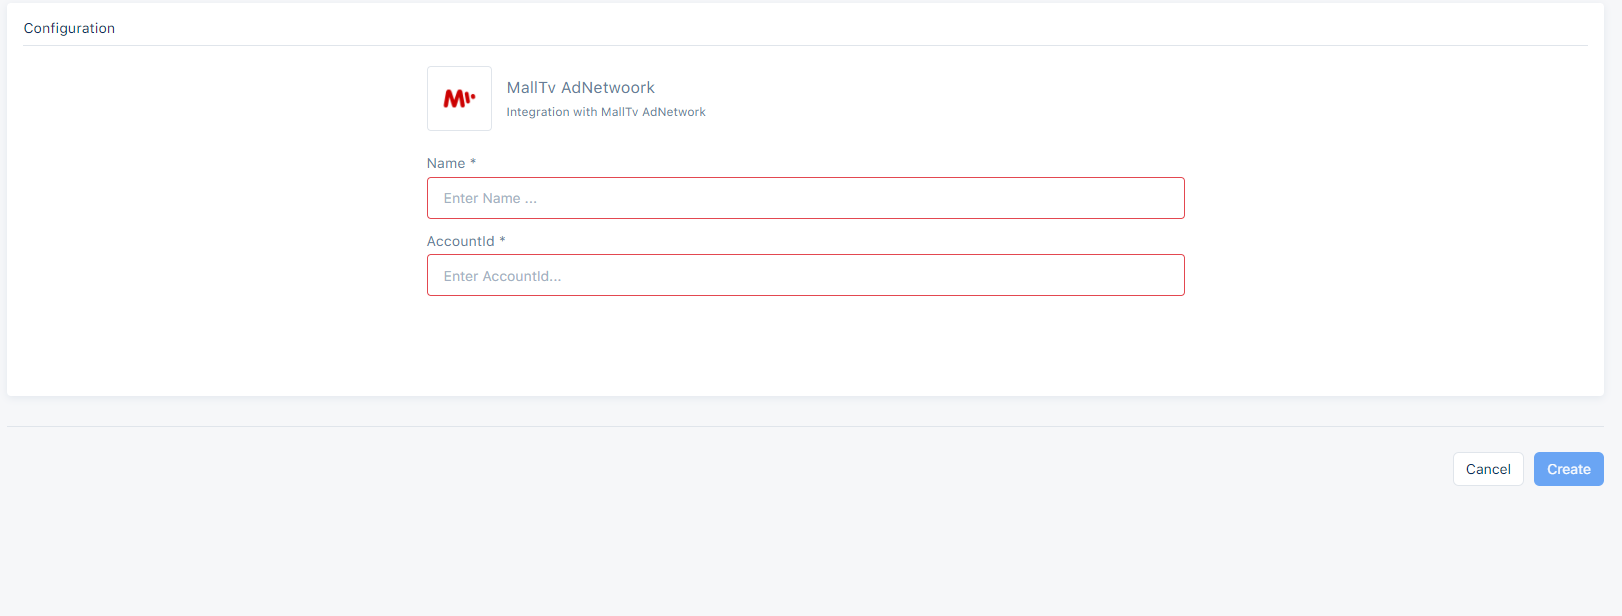
3. MallTv AdNetwork Integration
AccountID is required to activate an integration with MallTv AdNetwork. This is the unique identifier for the MallTv AdNetwork account.
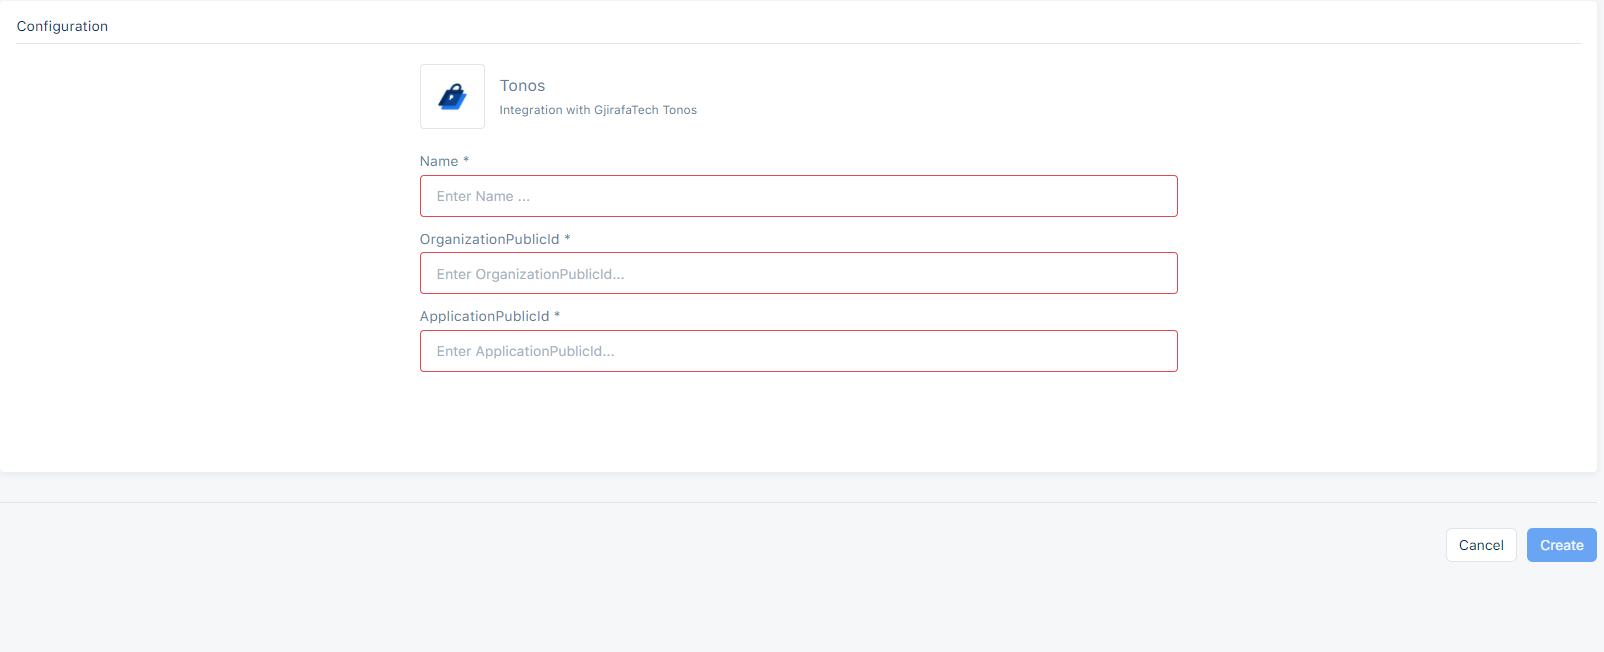
4. Tonos Integration
OrganizationPublicId is a required property to activate an integration with GjirafaTech Tonos. This is the unique identifier for the GjirafaTech Tonos organization.
ApplicationPublicId is an optional field that can be provided when activating an integration with GjirafaTech Tonos, if the integration needs to be in application level. This is the unique identifier for an application within a GjirafaTech Tonos organization.
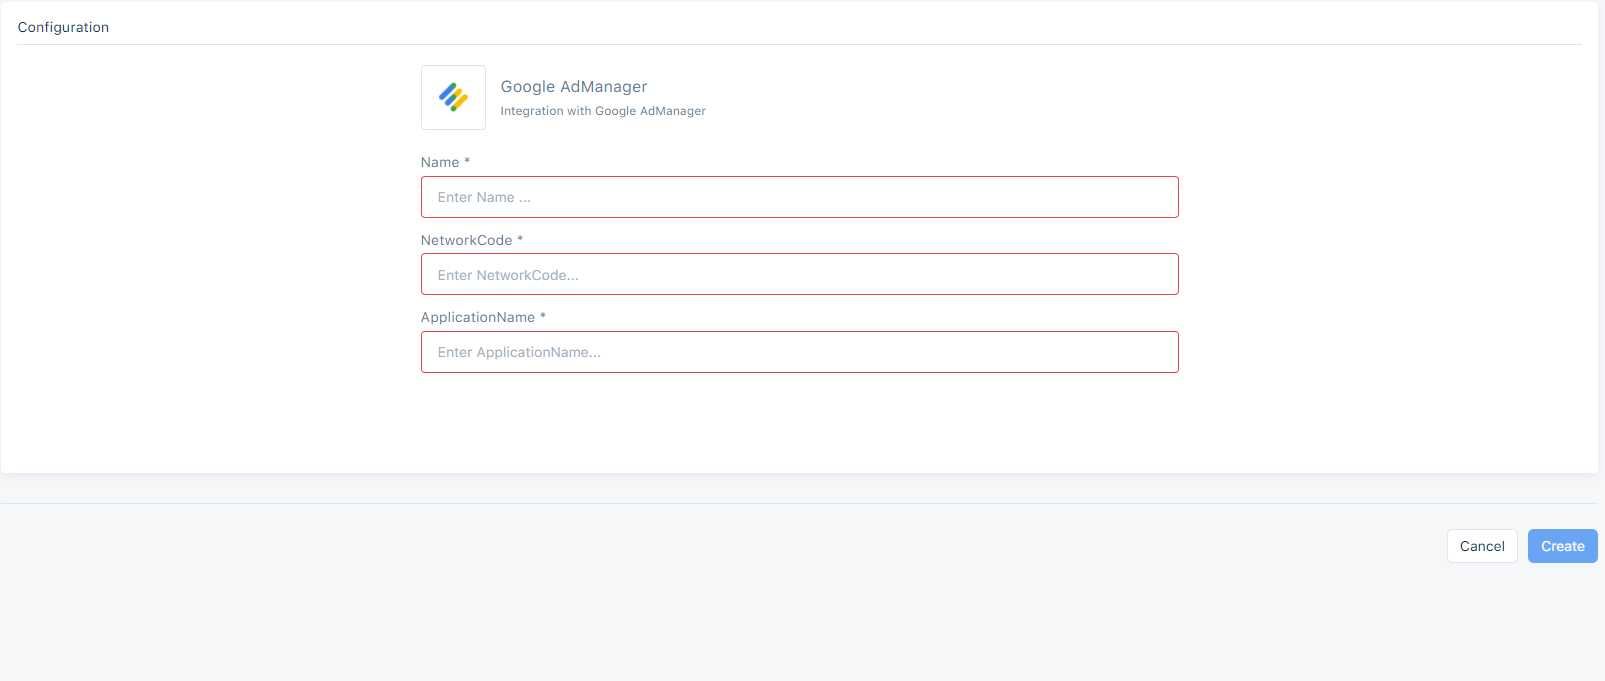
5. Google AdManager Integration
The integration between Bisko and Google AdManager (GAM) is done by using custom key-value targeting. Once configured, Bisko automatically creates a new targeting key (with the name bisko) in GAM through it's API which can then be used for targeting. Targeting keys can have multiple values, and in this case these values are the actual segments sent from Bisko. For more information about key-value targeting in GAM you can start with this link: https://support.google.com/admanager/answer/188092?hl=en
First you need to give Bisko access to create targeting key/value pairs in GAM
- Go to the Google Ad Manager network
- Under Admin menu choose Access & authorization
- Here you should have the access to add new users
- In Name field of new user write Bisko
- In Email field you need to add the following email: gjirafatech-bisko@rugged-practice-207717.iam.gserviceaccount.com
- Add a Role which has access to create and update targeting key/value pairs in GAM
After the configuration GAM is done you need to activate the integration in Bisko interface
NetworkCode is a required property to activate an integration with Google AdManager. This is a unique numeric identifier for the Ad Manager network.
ApplicationName is an optional field that can be provided when activating an integration with GAM. This can help identify the application, in this case Bisko, connecting to the Ad manager network.
If everything was configured correctly you should be able to push the segments from Bisko to GAM, by enabling them in the segment interface. To make sure Bisko segments are being sent to GAM you can do the following:
- Under inventory menu choose Key-values.
- There should be a targeting key with the name "bisko". If you cannot find this targeting key there might be a problem with the configuration.
- If the "bisko" targeting key is there, you can click on it then you will see a list of values, where the name is Bisko segment code and the display name is the name of the Bisko segment. If you find here the segments that you pushed from Bisko, it means the configuration and integration between Bisko and GAM is done successfully.
The last piece is sending Bisko segments to the GAM SDK when making requests for new ads. To do this, publishers that use GAM need to add the following piece of code right above the line of Bisko Web SDK script:
<script type="text/javascript">
    window.googletag = window.googletag || {};
    window.googletag.cmd = window.googletag.cmd || [];
    window.googletag.cmd.push(function () {
        var segments = window.localStorage.getItem("biskoSegments");
        window.googletag.pubads().setTargeting("bisko", segments ? JSON.parse(segments) : []);
});
</script>
6. PubMatic Integration
The Integration between Bisko and PubMatic is done by using Custom IDs from ID providers who are integrated with PubMatic. Data Integration requires these steps:
- Audience Source creation
- Audience registration
- Data transfer
Audience Source Creation
- Registering audiences requires an Audience Source/data partner ID (DPID) and Publisher ID (PUBID Data). Providers must register new audiences with source audience IDs before sending data to PubMatic. PubMatic ignores unrecognized audience IDs to avoid processing mistakenly sent data.
Audience Registration
- Audiences are registered using Audience Registration APIs.
Data Transfer
- Data Transfer uses SFTP to transfer audience data to PubMatic within a file, where each row of the file contains the audience parameters.
After the CustomIDs are provided from PubMatic, you need to activate the integration in Bisko interface
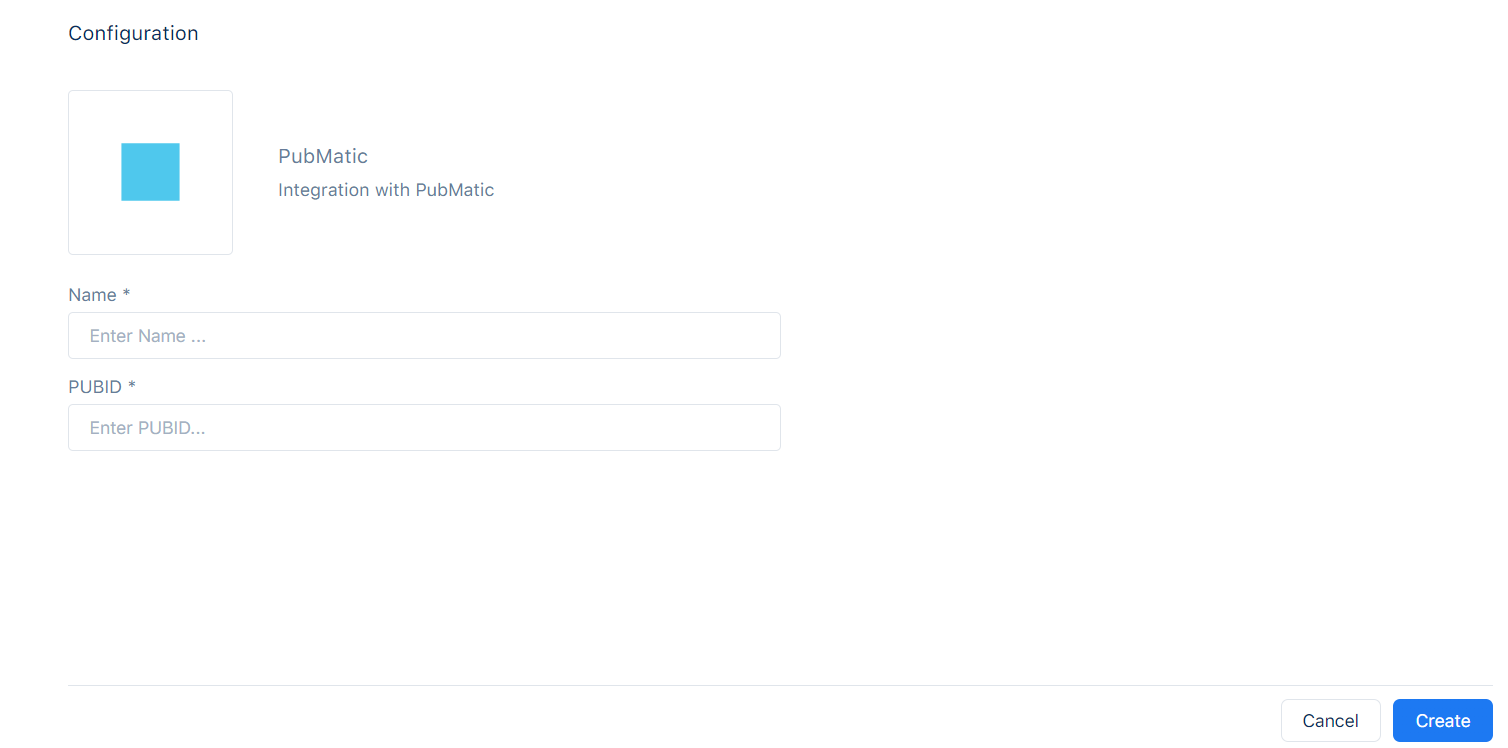
- DPID is a required property generated by PubMatic and represents the id that is assigned to the data partner during integration.
Introduction to Records
When an event occurs, data regarding the content related to the event can be collected in generic structure that Bisko provides. A single structure can't be adequeate for all kind of events that's why Records are used. Records provide definition of event tables in which collected data are structured in. Then, these records can be used to save an event or to target a segment. For more information about using records in segments, follow this link Records in Segments
To create a Record these steps should be followed:
1. Record name
Every record must have a name. The name should be descriptive and easier to find or group with similar records. This field is mandatory.
2. Alias
Alias is an alternate identifier for the record name. It should be unique name since it is use in the collection code and also it represents the name of the table where record data are stored. It must start with letter and contain only letters, numbers and underscores. No space and special characters are allowed. This field is mandatory.
3. Description
Description should be a representation of the record and that helps the user to understand record specifics.
4. Record Type
There are three different ways to send events in records:
Web - if the record data are sent using Web SDK. This record type is preselected by default.
Mobile - if the record data are sent using MobileSDK (Android or IOS).
API - if the record data are sent directly to the Bisko Edge API endpoint.

For more information about record collection using WebSDK, follow this link: WebSDK event examples
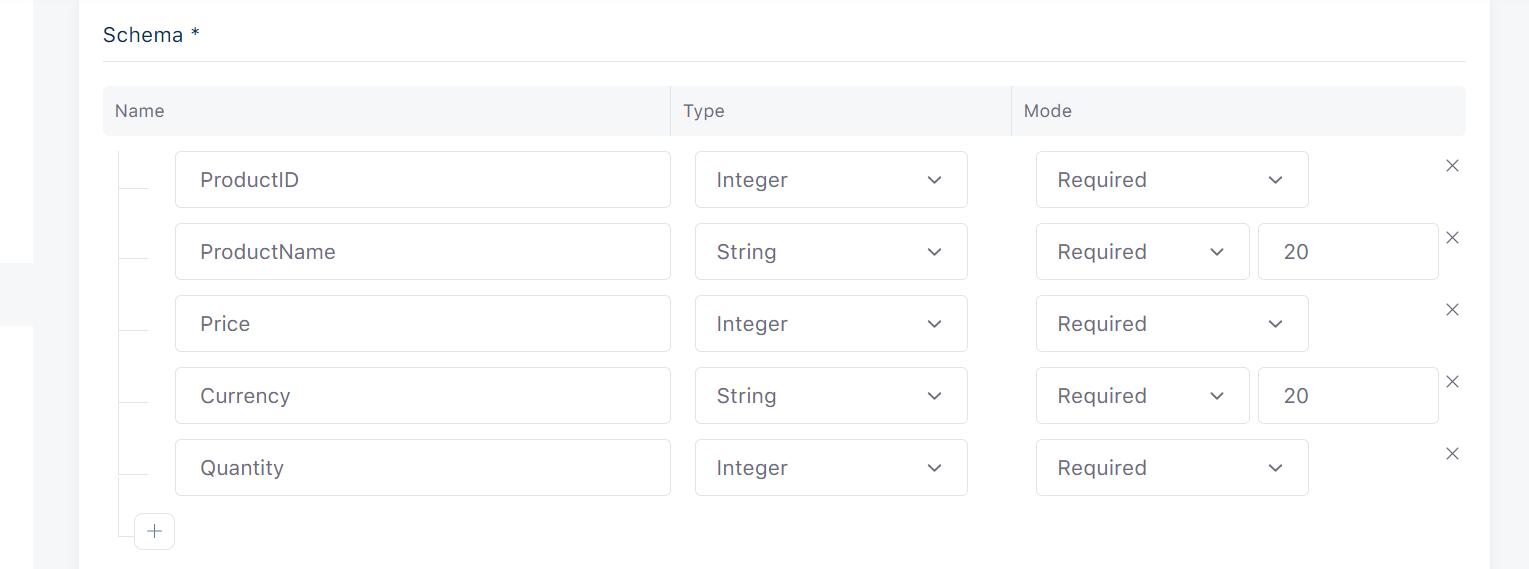
Schema
var payload = {
  ProductID: 1, //This field is Required.
  ProductName: "Name of the product", //This field is Required.
  Price: 1, //This field is Required.
  Currency: "Currency", //This field is Required.
  Quantity: 1, //This field is Required.
};
bsk("record", "purchase", payload);
 On the other hand if we have a record for article read in a blog site, the record will look like the following:
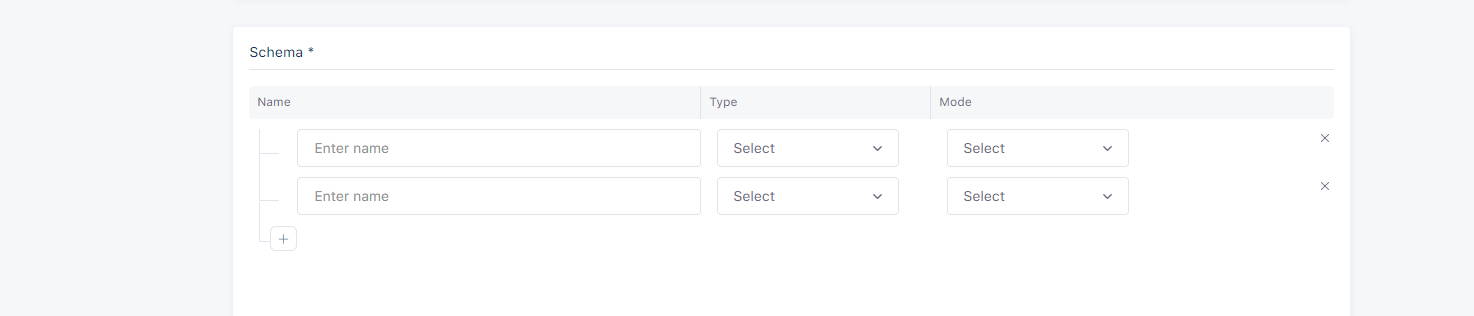
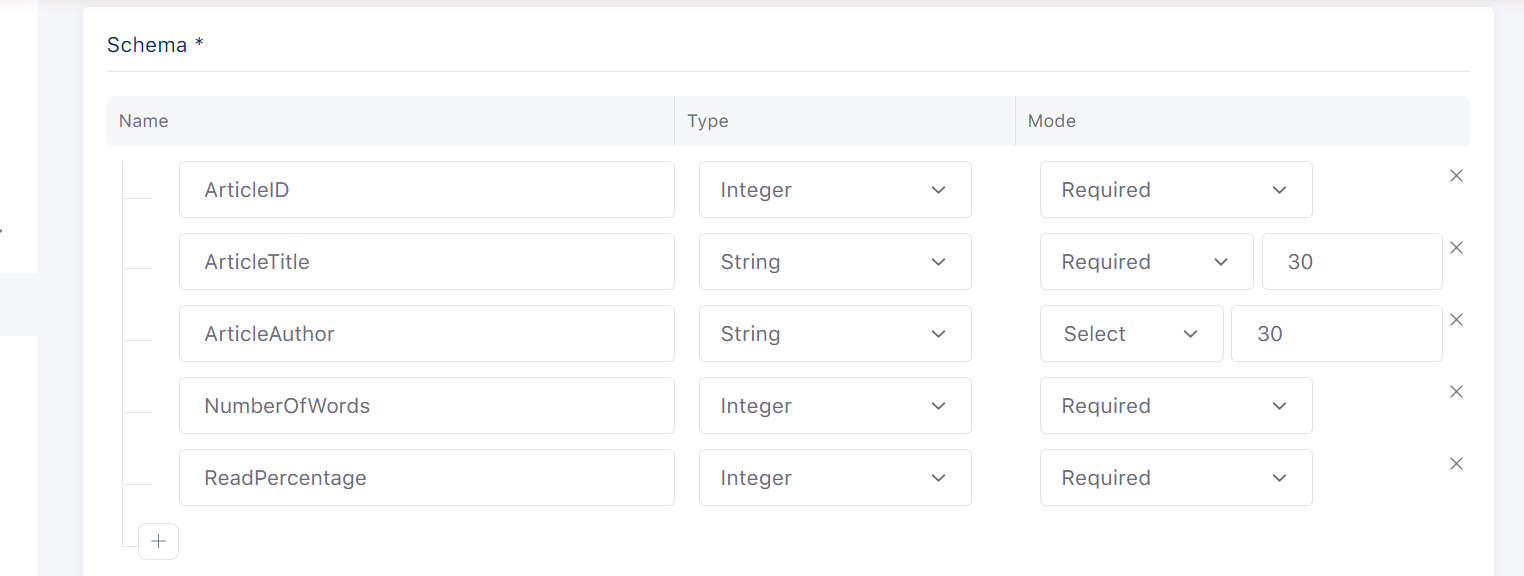 Insert columns section contains a schema on which columns of the table are defined. Schema defined fields are :
1. Column Name
Column name is an identifier of the schema column. This field should only contain alphanumeric characters or underscores and should not start with a number.
2. Column Type
Column type specifies the type of schema column. Available data types are:
Fixed String - is used to store alphanumeric data. Its size can be set by user choosing ColumnMaxLength.
String - is used to store alphanumeric data. Its size can be set in range [1 to 1,000,000,000] characters.
Integer - is used to store whole numbers that range [-2,147,483,647 to 2,147,483,647].
Long Integer - is used to store whole numbers that range [-2^{63} to 2^{63} - 1 ]
Decimal - is used to store exact numeric that range Decimal256(5) - ( -1 10^(71), 1 10^(71) )
Double - is used to store floating-point numbers in range [1.7E +/- 308] 15 digits.
Date - is used to store the calendar date.
DateTime - is used to store a date plus a time calculated to microseconds. The following are the supported formats.
General form Format Example dd-MMM-yyyy DATEw 15-JAN-22 dd-MMM-yyyy DATEw 15-JAN-2022 MM/dd/yy ADATEw 01/15/22 MM/dd/yyyy ADATEw 01/15/2022 dd-MMM-yyyy HH:mm DATETIMEw 15-JAN-2022 17:30 dd-MMM-yyyy HH:mm:ss DATETIMEw.d 15-JAN-2022 17:30:00 dd-MMM-yyyy HH:mm:ss.s DATETIMEw.d 15-JAN-2022 17:30:00.0 yyyy-MM-dd HH:mm YMDHMSw 2022-01-15 17:30 yyyy-MM-dd HH:mm:ss YMDHMSw.d 2022-01-15 17:30:00 yyyy-MM-dd HH:mm:ss.s YMDHMSw.d 2022-01-15 17:30:00.0 dd-MMM-yyyy HH:mm DATETIMEw 15-JAN-2022 05:30 PM dd-MMM-yyyy HH:mm:ss DATETIMEw.d 15-JAN-2022 05:30:00 PM dd-MMM-yyyy HH:mm:ss.s DATETIMEw.d 15-JAN-2022 05:30:00.0 PM yyyy-MM-dd HH:mm YMDHMSw 2022-01-15 05:30 PM yyyy-MM-dd HH:mm:ss YMDHMSw.d 2022-01-15 05:30:00 PM yyyy-MM-dd HH:mm:ss.s YMDHMSw.d 2022-01-15 05:30:00.0 PM yyyy-MM-ddTHH:mmTZD YMDHMSw TZD 2022-01-15T16:30+01:00 yyyy-MM-ddTHH:mm:ssTZD YMDHMSw.d TZD 2022-01-15T16:30:00+01:00 YYYY-MM-ddTHH:mm:ss.sTZD YMDHMSw.d TZD 2022-01-15T16:30:00.0+01:00 yyyy = four digits year.\ MM = two digits month (01=January, etc).\ dd = two digits day of month (01 through 31).\ HH = two digits of hour (00 through 23).\ hh = two digits of hours (00 through 23) with AM/PM subfix.\ mm = two digits of minute (00 through 59).\ ss = two digits of second (00 through 59).\ s = one or more digits representing a decimal fraction of a second.\ TZD = time zone designator UTC (Z or +HH:mm or -HH:mm).
Boolean - is used to store True or False data values.
Array of Strings - is used to store a list of strings.
Array of Integers - is used to store a list of integers.
Array of Doubles - is used to store a list of floating-point numbers.
3. Column Mode
Column mode can be:
Required - if that column is required and should be filled.
Nullable - if that column is nullable and can be empty.
Record Presets
Record presets are some columns that can be added in table. These are columns that you're not required to send data since they are automatically collected by the SDK or the enriching service e.g., country, operating system, browser, utm. Some record presets like Device Family and Device Type are selected by default and others can be selected by user.
Device presets are accessible by choosing each Record Type(Web, Mobile, API). Device presets are:
Device Family
This field is used to store the Device Family of the user e.g., "PC", "Apple".
Device OS Version
This field is used to store the Operating System Version e.g., "10.15.7".
Device Browser
This field is used to store the browser of user device e.g., "Chrome".
Device Platform
This field is used to store the platform of user device e.g., "Mobile", "Web".
Device Operating System
This field is used to store the Operating System of user device e.g., "Windows".
Device Model Name
This field is used to store the name of user device model e.g., "Iphone 11".
Device Language
This field is used to store the language of user device e.g., "cs-CZ".
Device Screen Width
This field is used to store the width of user device screen e.g., "190".
Device Type
This field is used to store the type of user device e.g., "Mobile", "Tablet".
Device Input Selector
This field is used to store the input selector of the user device e.g.,"touch".
Device Screen Height
This field is used to store the height of user device screen e.g., "1080".
Device Marketing Name
This field is used to store the marketing name of the user device. This is accessible only by choosing Mobile Record Type.

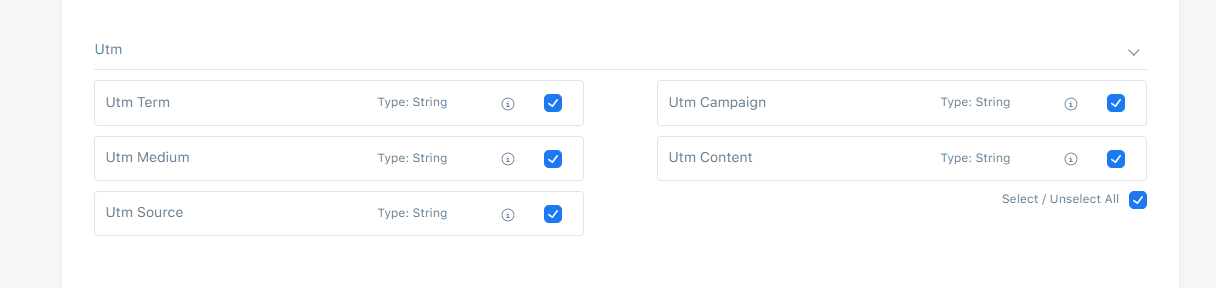
Utm presets are accessible only by choosing Web Record Type.
Utm Term
This field is used to store the audience who clicked on our link e.g., "utm_term=keyword".
Utm Campaign
This field is used to store name of the campaign or promotion you are running e.g., "utm_campaign=thanksgiving+sale".
Utm Medium
This field is used to store the type of traffic you are receiving e.g., "cpc(cost per click)".
Utm Content
This field is used to store the type of ad that is beign used e.g., "video".
Utm Source
This field is used to store the source of the traffic the user is receiving e.g., "Google".
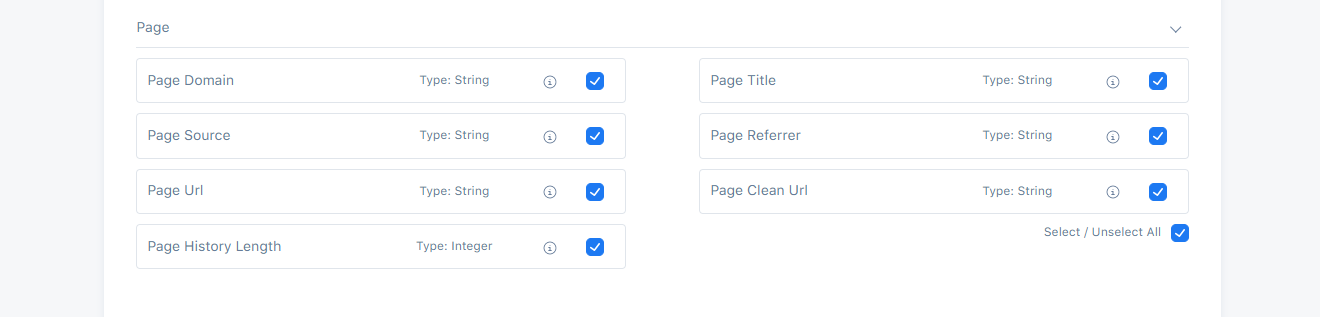
Page presets are accessible only by choosing Web Record Type.
Page Domain
This field is used to store the domain of the page e.g., "gjirafa.tech", "gjirafamall.com".
Page Title
This field is used to store the title of the page e.g., "GjirafaMall: Kufje Apple AirPods Max, të kaltra".
Page Referrer
This field is used to store the address of the web page which is linked to the resource being requested e.g., "https://gjirafamall.com/search?q=opi".
Page Source
This field is used to store source of the page e.g., "facebook.ccom".
Page Url
This field is used to store the url of the page e.g., "https://gjirafamall.com/?utm_source=facebook&utm_medium=organic&utm_campaign=button".
Page Clean Url
This field is used to store the URLs that are meaningul to non-expert users. The UTM parameters are removed e.g., "https://gjirafamall.com/".
Page History Length
This field is used to store the number of elements in history session e.g., "1524".
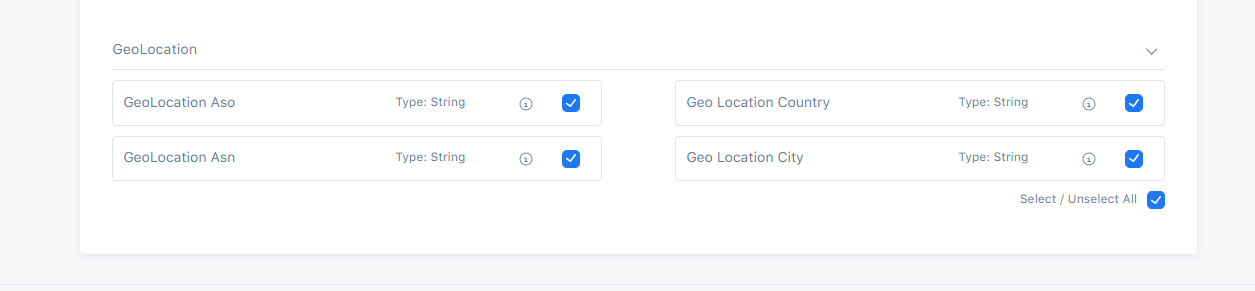
GeoLocation presets are accessible only by each Record Type.
GeoLocation Aso
This field is used to store the Address Supporting Organization of geolocation e.g., "Liberty Global B.V.".
Geo Location Country
This field is used to store the ISO two letter country code of the user e.g., "XK".
GeoLocation Asn
This field is used to store the Autonomous System Number of geolocation e.g., "6830".
Geo Location City
This field is used to store the located city of the user e.g., "London".
Introduction to Connections
A connection provides data sharing from an organization to another organization.
For example organization A enables a connection and shares data that user has given consent to be shared with organization B. While a connection is enabled, shared data from A can be used by B, for example in segment creation. For more information about segment creation with datasharing enabled, follow this link: Connections in segments
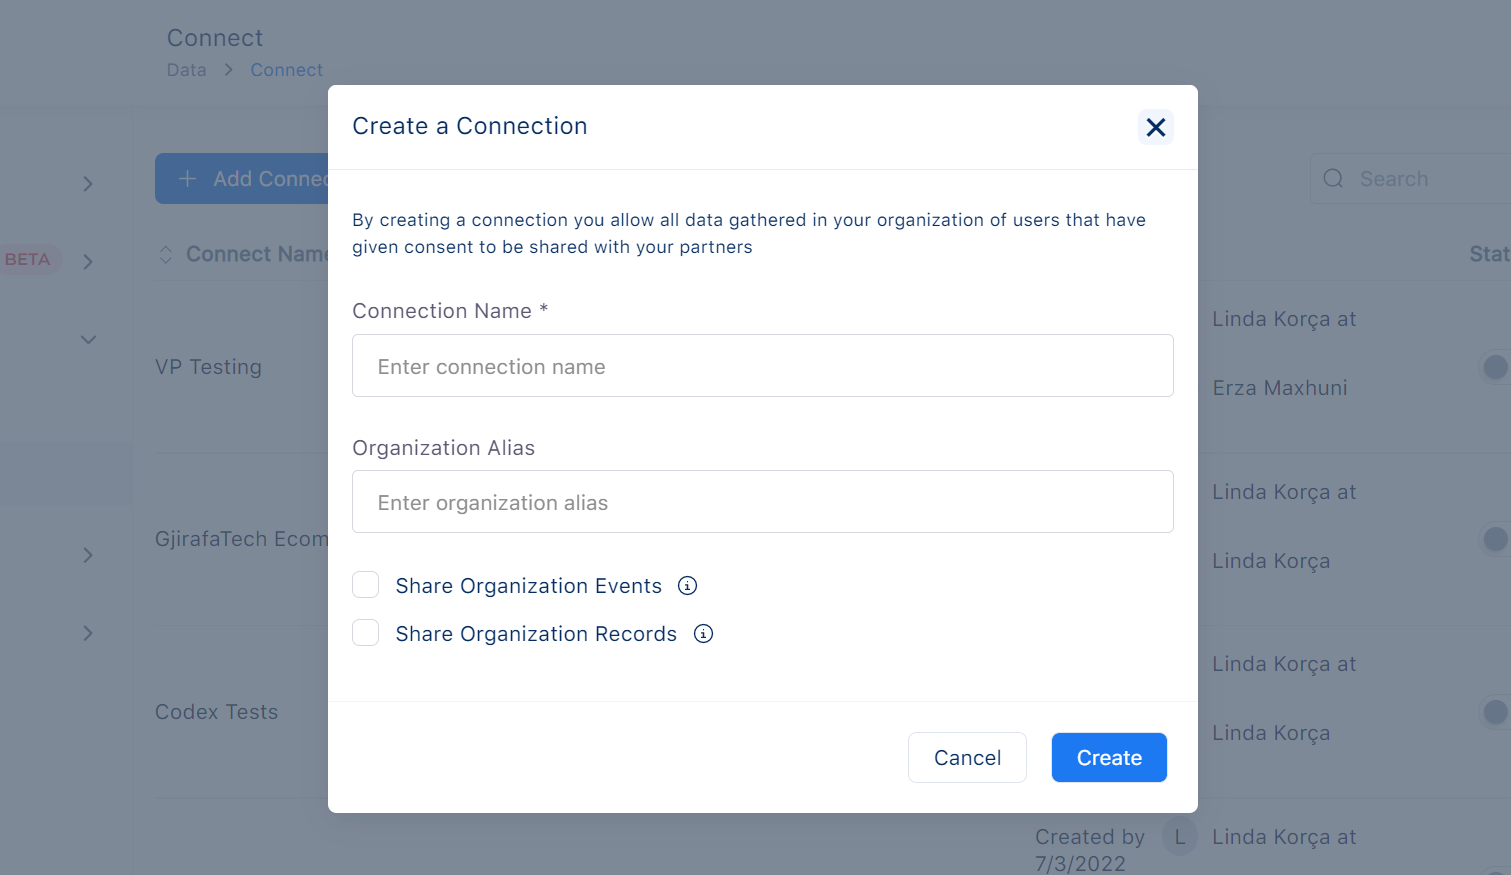
To create a connection these steps should be followed:
1. Connection Name
Every connection must have a name. That name should be descriptive and also easier to find or group with similar connections. This field is mandatory.
2. Organization Alias
Organization alias is a mandatory field. Name of the organization should match the exact organization alias. If a connection was created before with a specific alias, another connection cannot be created with the same alias. That means each organization alias is unique.
There are types of data that can be shared:
Organization Events
Organization Records
3. Share Organization Events checkbox
By choosing Share Organization Events checkbox, the possibility to share events from organization A to organization B, is activated.
4. Share Organization Records checkbox
By choosing Share Organization Records checkbox, the possibility to share records from organization A to organization B, is activated.
$Enable/Disable$ $connections$
The created connection is enabled by default. Enabled means that data sharing is one way and the data will be shared with the chosen organization based on configuration. For all users that have given consent, events and all data collected in events table will be shared. Enabled connection will not share only events data but also records can be shared.
For more information about user consent for data sharing, follow this link: User consent
A connection can be also disabled. Disabling a connection means that data sharing will be deactivated. Also, the collected data from the moment that connection has been disabled, will not be shared with the organization.
The saved data(records or events) at an organization will stop processing when the connection is disabled. Creating a segment after disabling a specific connection will prevent disabled organizations to be shown.
For more information about connections in segments follow this link: Connections in Segments
Introduction to Data Exports
Data Exports provides the possibility to export the raw data to external services outside of Bisko. The raw data will start to be saved to the external provider from the moment when the data export is enabled, meaning the data collected before the export was enabled will not be migrated to the external provider. Data export will be enabled after valid credentials are given.
To create a data export these steps should be followed:
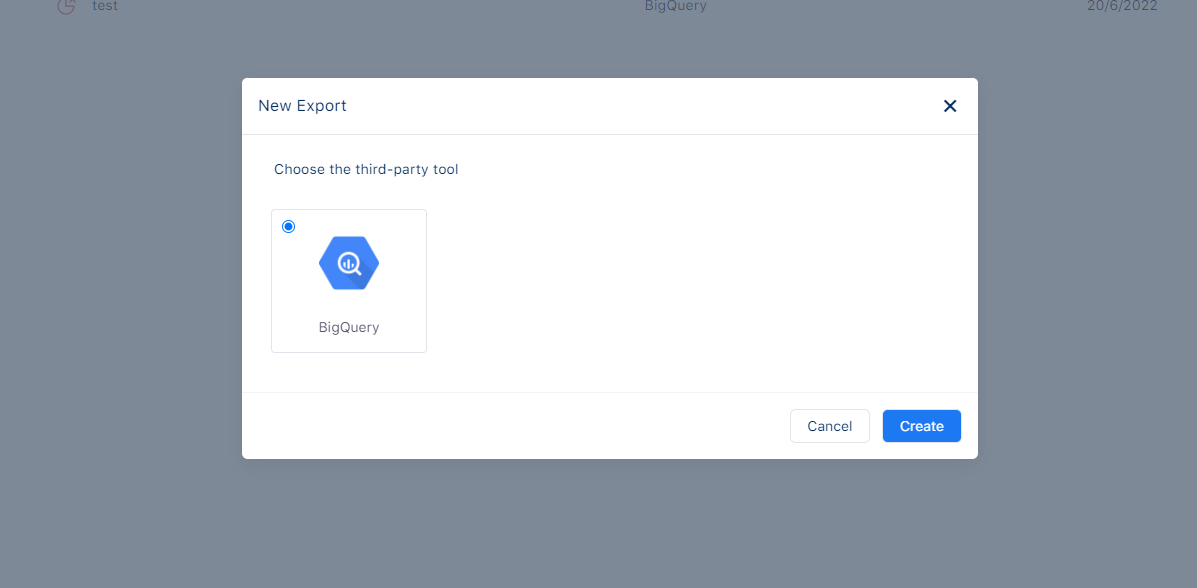
1. Choose a provider
To create an export first choose a provider from available providers. The chosen provider can be integrated with Bisko. For the moment only BigQuery is available, but in the future more providers will be added.
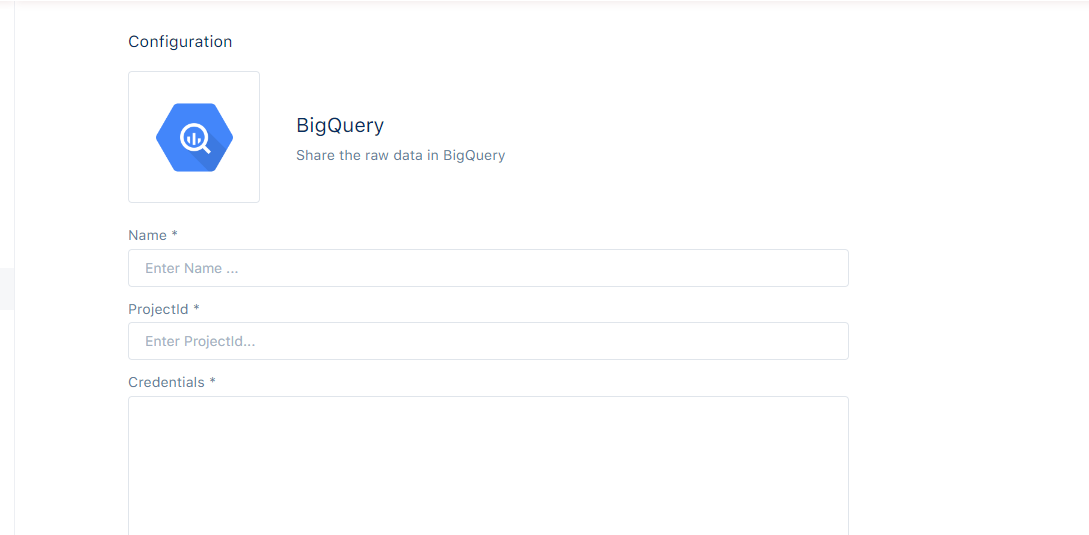
Integration with BigQuery
After choosing BigQuery as an external provider, these steps should be followed to complete the creation of data export process:
1. Name
Every export must have a name. That name should be descriptive and also easier to find or group with similar exports. This field is mandatory.
2. ProjectId
The projectId is an unique identifier for a specific project and helps in differentiating one project from all others in Google Cloud.
3. Credentials
Credentials is a mandatory field and is used to ensure that Bisko services have access only to the needed BigQuery resources. In order to enable a data export with BigQuery, a service account is needed. For more information about creating a service account follow this link: Service accounts.
Service account is used as the identity of the application. That account should have access in project to create and update datasets and tables within the given project. For each service account a credentials file should be generated. For more information about generating credentials file follow the link:. Credentials File
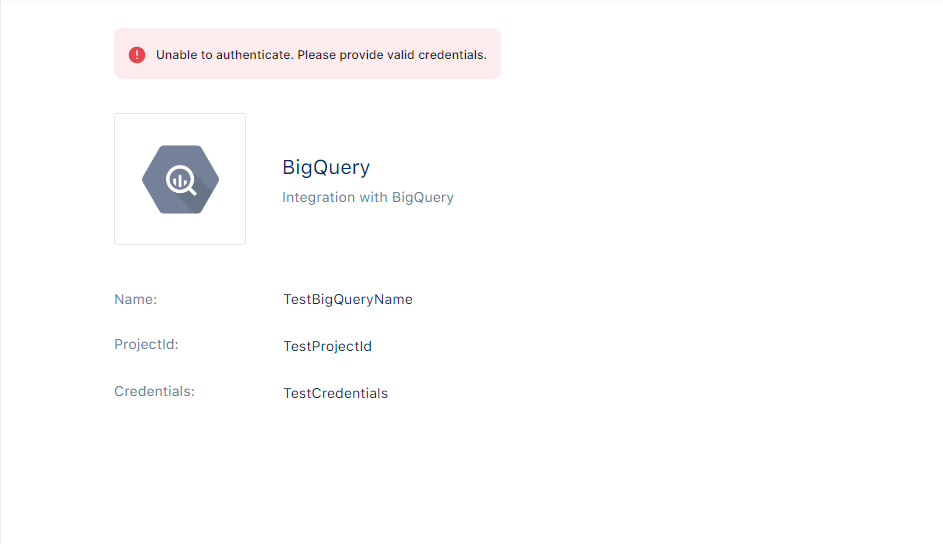
An export fails if the given credentials were incorrect. In Export Details Screen you can see more information regarding why an export failed to be activated.
Introduction to Contextual Targeting
Contextual Targeting - is the technique of targeting websites based on keywords associated with the products or services being offered. The most efficient way for the user experience to target websites is using Topics. Topics are a group of keywords that enable you to target the consumed content by the user in general. Keywords are words or phrases that enable you to target the specific content that is being used.
Main advantage of contextual targeting is that it provides users to access pertinent content without requiring personal data.
Compared to Audience segmentation where the process of targeting is based on past events performed by a specific user, in contextual targeting, ad placement is made by considering the particular content that the user is viewing at that precise moment.
The main criteria that must be met to be eligible for targeting is:
The page's content is considered to contain a specific Topic, if the keywords of that content contain at least one of the keywords of the topic.
In cases where the content contains multiple topics, only the 20 most relevant topics are returned. The relevance is defined by an algorithm, that takes into account the number of matching keywords between content and topic, as well as the total number of keywords in content and topic.
To create a Topic these steps should be followed:
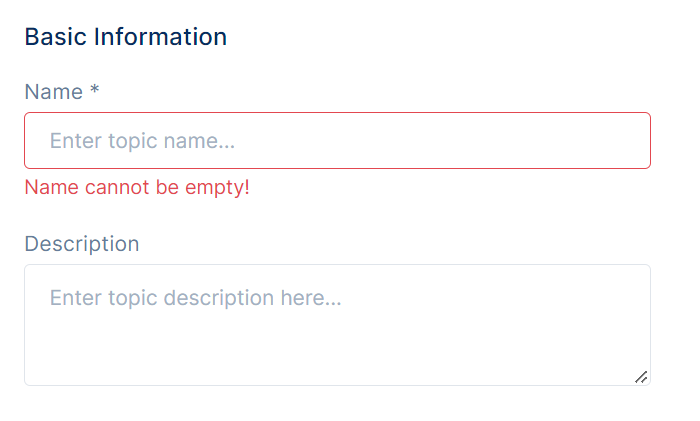
1. Topic name
Every topic must have a name. The name should be descriptive and easier to find or group with similar topics. This field is mandatory.
2. Description
Description should be a representation of the topic and that helps the user to understand topic specifics.
3. Add Keywords
There are three different ways to add keywords:
3.1 Manual Input Keywords
This method allows user to add keywords manually from the input. A keyword can be a single word, or a phrase with up to 4 words. This field is mandatory. There is the possibility to delete a single keyword or all keywords from the list.
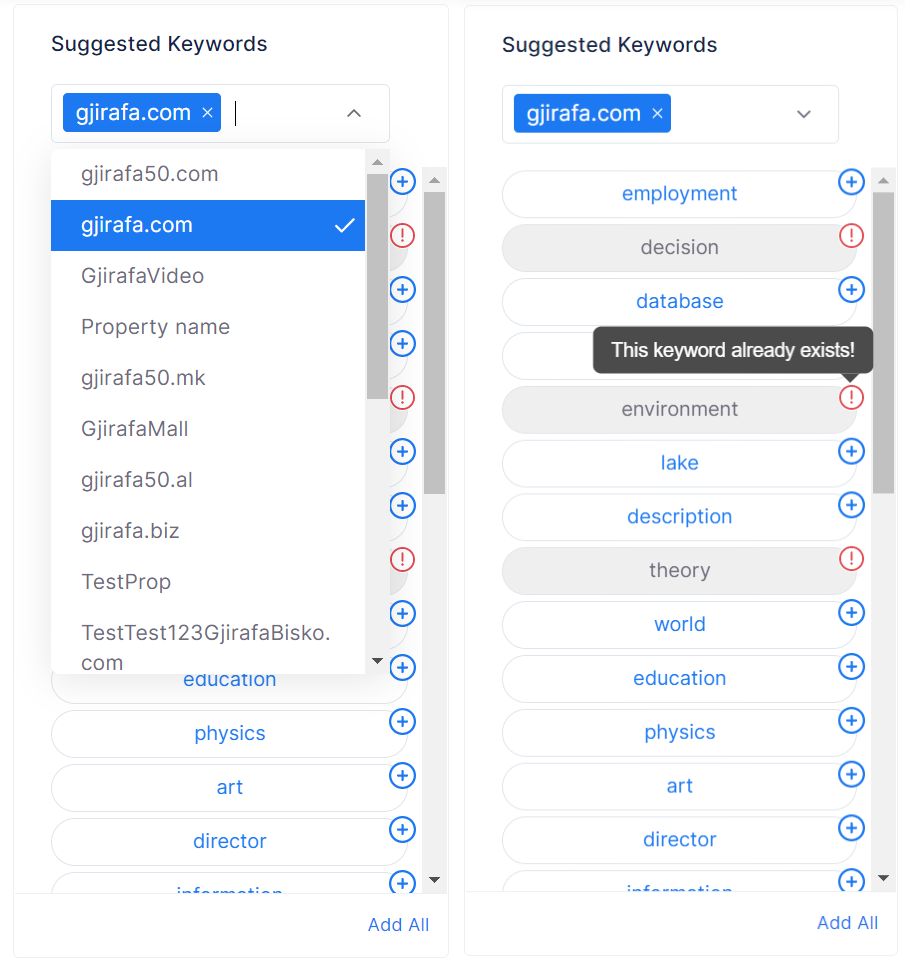
3.2 Suggested Keywords
This method offers you a list of suggested keywords. After selecting one or more properties, besides initial keywords, this list will contain more keywords that are specific for chosen properties.
Keywords can be added one at a time or all at once.
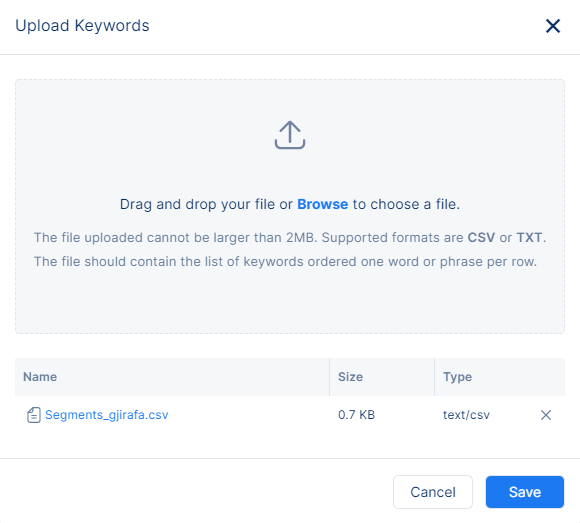
3.3 Upload Keywords File
This method offers you the possibility to add keywords by uploading a file in two optional ways:
- Click in Browse button on the modal overlay and upload the keywords file
- Drag and drop the keywords file
The requirements for a file to be valid are:
- The uploaded file should not be larger than 2MB.
- The uploaded file supports only formats CSV or TXT
- The file should contain the list of keywords ordered one word or phrase per row.
4. Exclude Keywords
Exclude keywords, also known as negative keywords, are specifically excluded from a targeting strategy. If a topic contains only negative keywords, the topic is only eligible for targeting if no negative keywords match was found to the content targeted. Additionally, it also states that if a topic contains both positive and negative keywords, and the content keywords match any of the negative keywords from the topic, the topic is not eligible for targeting.
In this context, exclude keywords serve as a way to narrow down the targeting criteria and eliminate topics that are not relevant to the content being targeted.
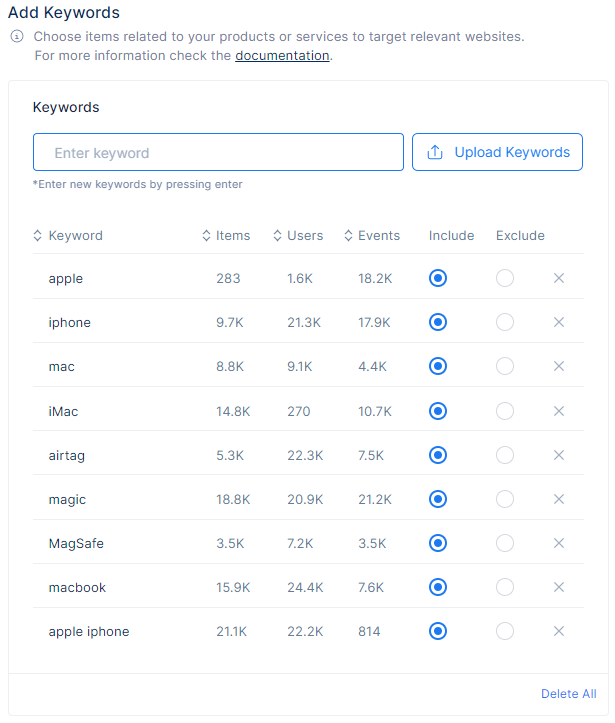
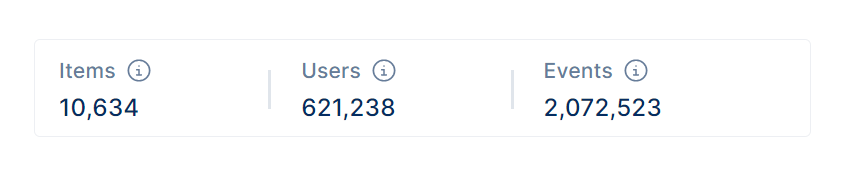
5. Keywords Results
These results refer to the output of a keyword analysis used in contextual targeting. The data provided, such as the number of items, users, and events, are used to understand user behavior and interests in order to effectively target them with relevant content.These results provide insight into the most relevant topics and keywords for a specific target audience.
The Items value likely refers to the total number of unique pages targeted for the topic that have been analyzed or searched for relevant keywords.
The Users value likely refers to the total number of unique users whose behavior or activity has been analyzed in relation to the keywords and topics being targeted.
The Events value refers to the number of specific actions or interactions that have been tracked and analyzed in relation to certain keywords or topics.
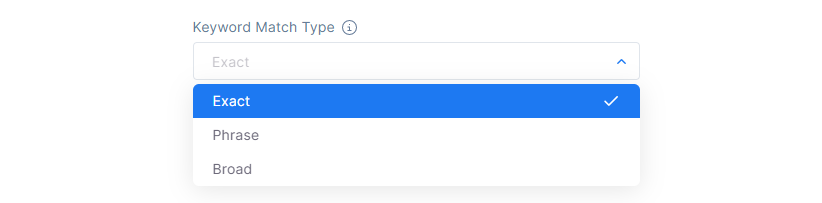
6. Keyword Matching Type
Keywords matching type is a feature that allows users to specify how closely the keywords they choose should match the content they want to target.
There are several types of keyword matching:
Exact is a type of keyword targeting which will allow you to target content that contains exact keyword terms, in the same order, without extra words.
It is the same word as in the content
It has no additional words at the beginning or end
If the keyword contains more than one word is considered as a match if:
It contains all of the words as in the content
It has the same order of words as in the content
Phrase is a type of keyword targeting which will allow you to target content that contains the exact keyword terms in the same order even if they include additional words at the beginning or end.
It is the same word as in the content
It has additional words at the beginning or end
If the keyword contains more than one word is considered as a match if:
It contains all of the words as in the content
It has the same order of words as in the content
Broad is a type of keyword targeting which will allow you to target content that contains any of the words, even if they are in a different order.
It is the same word as in the content
It has additional words
If the keyword contains more than one word is considered as a match if:
It contains one of the words as in the content
It has the different order of words as in the content
| Topic Keyword | Content Keyword | Exact | Phrase | Broad |
|---|---|---|---|---|
| Apple | Apple | ✔ | ✔ | ✔ |
| Apple MacBook | Apple MacBook | ✔ | ✔ | ✔ |
| Apple MacBook | Apple MacBook Pro | ✗ | ✔ | ✔ |
| MacBook Pro | Apple MacBook Pro | ✗ | ✔ | ✔ |
| Apple MacBook Air | Apple MacBook Pro | ✗ | ✗ | ✔ |
| Apple Airpods Pro | Apple MacBook Pro | ✗ | ✗ | ✔ |
| Pro Max | Apple MacBook Pro | ✗ | ✗ | ✔ |
| MacBooks | MacBook | ✗ | ✗ | ✗ |
| Mac | MacBook | ✗ | ✗ | ✗ |
| AppLE | Apple | ✔ | ✔ | ✔ |
| red green blue | red green blue | ✔ | ✔ | ✔ |
| green blue | red green blue | ✗ | ✔ | ✔ |
| red green | red green blue | ✗ | ✔ | ✔ |
| red white blue | red green blue | ✗ | ✗ | ✔ |
| blue white black | red green blue | ✗ | ✗ | ✔ |
| white | whites | ✗ | ✗ | ✗ |
| white | White | ✔ | ✔ | ✔ |
Each matching type has its own advantages and disadvantages. Exact match is the most restrictive and will result in fewer impressions and clicks, but will target only users searching for the exact keyword or its close variants. Broad match is the most inclusive and will result in more impressions and clicks, but may also lead to less relevant traffic. Phrase match is a middle ground between the two, and allows to reach a wider audience while still ensuring that the content is relevant to the keywords entered.